Whenever you want to create an integration, you need a way to access the required information. Unfortunately, not every software supports integrations, so we then have to take matters into our own hands. When it comes to emulators, it’s not hard to take an existing open-source emulator and access the values in memory. But then, the hard part is to make sense of those values.
Considerations and context
We will continue working on the same emulator project seen in my previous article. You can find the repository used in this article here. It’s also worth knowing the basics about the hexadecimal system since things might make more sense for you by knowing it.
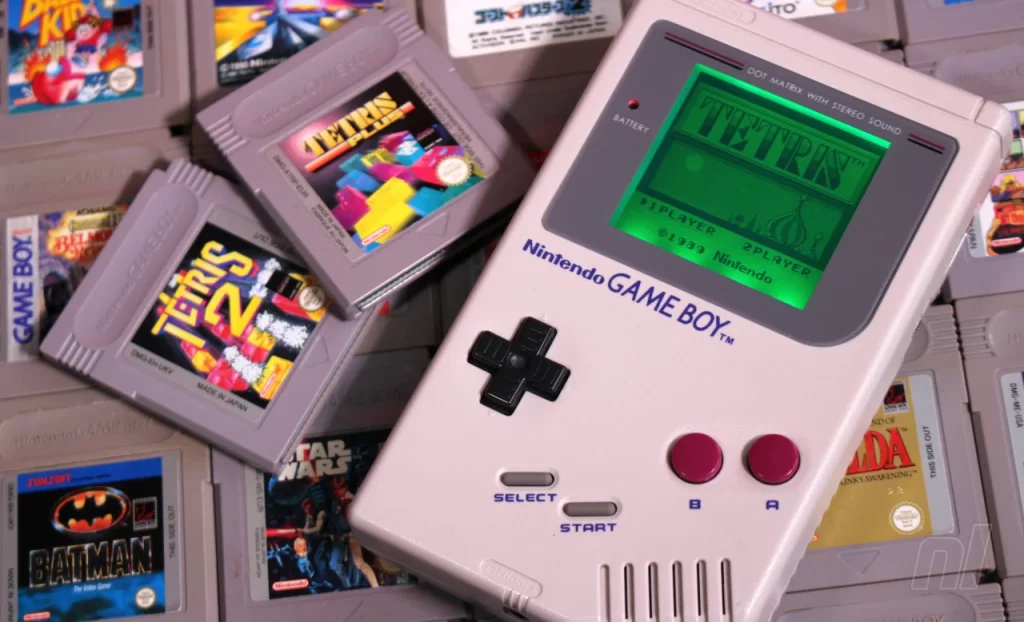
In this article, we will read values from a Pokemon Red ROM. So if you would like to follow along, feel free to clone the repository and grab a ROM legally.
Understanding how values are stored
Single address values
Let’s start with a basic example: let’s suppose that we want to know the current turn in a battle. That’s very simple, we just need to check the current value in the memory address CCD5. Since we read and write the values in decimal, we just have to read them. And where did we get this address? Well, a very kind soul created this great list, which contains many useful addresses that we can use.
So far so good right? Now, let’s increase the difficulty slightly. Say we want to read the value for the current map. As before, we need to figure out which address to read from (spoiler: it’s D35E), and then read it. But since the value is stored as a decimal, we need to do some conversion if we want to know the name of the map. Thankfully, another kind soul created this list for us, so we just have to create some code.
Multiple addresses values
Now, let’s suppose we want to read the name of the enemy’s Pokemon. Just as usual, we need to find out the address for the value, but in this case, we need to read from multiple addresses (CFDA to CFE3). That’s because each address can only hold a single byte, so if we were to read only a single address, we would get only a single character.
To make things worse, as you might expect, we need to convert each value to the corresponding character. But don’t worry, because guess what? That’s right, another kind soul came up with the encoding for us! It can be accessed here, so all we need to do is to create some code that converts the values. We’ll cover it later, as it requires a slightly special handling.
Subscribing to values
Now that we understand how the values are stored, let’s analyze how we can get notified about changes in addresses. For that, we will use this class called “MemoryWatcher“, which is responsible for keeping track of value changes.
In the AddSubscription method, we receive the address ranges to monitor, and also a list of relevant ones. The AddressRange is a struct that basically represents multiple addresses. The difference between the subscribed address and the relevant address is that only the subscribed addresses will trigger a notification, but the values for all address ranges will be included in the notification. The method creates a subscription, which is verified every time an address is updated. In the end, it returns an ObservableStack that has an ItemAdded event, so the caller can be notified whenever a change has occurred.
The OnMemoryWrittenAsync method is called every time an address is updated. It updates the _currentValues dictionary, so when we need to get values, we don’t have to bother the emulator. Then we check if we have a subscription for that address. In case we do, we get all values for every address in that subscription, and tell our MemoryAddressUpdateNotifier that something has changed.
Yes, this method is async void, and in most cases, this is a very bad practice. The reason for me to adopt it here is that since this method is called by our emulator, we don’t want to wait for the result, and also can’t afford to create thousands of Tasks. We want this call to be as fast as possible, otherwise our emulator will be terribly slow.
Notifying value changes
When it comes to notifying, our MemoryAddressUpdateNotifier is the one responsible for handling it. It has a list of all created channels, represented by a dictionary using an ID as key, and having an ObservableStack for its value. Every time we subscribe to a new address range, the AddChannel method adds a new item to this dictionary.
In the UpdateChannel method, we receive the ID of the channel to update the subscribed address range, all related address range values (that is, the subscribed and the relevant ranges), and exactly which address was changed.
It first creates a new MemoryAddressUpdatedNotification, that simply holds a dictionary with every related address range value. The dictionary uses the subscribed range as a key, as we, in the future, will use it to check if the value has actually changed in order to prevent sending multiple useless notifications.
Moving on, we then check if we should send the notification. This is needed due to the fact that we need to handle those values that are stored across multiple ranges, such as the name. We cannot send a notification for every single address change, otherwise we would be sending fake data. For example, let’s suppose the enemy’s Pokemon changed from a Ratata to a Pidgey. By sending an update every address change, the subscriber would receive the following values:
- Patata
- Pitata
- Pidata
- Pidgta
- Pidgea
- Pidgey
Therefore, we should only send when the emulator has finished updating the values. And how do we know it? Luckily for us, it will update the address value, even if it is for the same one. So for example, even if we face a fisherman with multiple Magikarps, we will still get updates for all the addresses. So by keeping track of the updated addresses with the _remainingAddressToUpdate dictionary, we can know for certain when it’s time to send the notification.
Consuming the notifications
In order to get notifications, we need to call the AddSubscription method inside the MemoryWatcher, as we mentioned earlier. Since every game will have its own set of addresses, it makes no sense to add this logic in the same project that we have our monitoring logic, right? So let’s create a new project and a class that creates those subscriptions.
Inside the Run method, once we get a reference to the existing MemoryWatcher, we can start subscribing to the address ranges we want to. For example, let’s check the first subscription. We first create a range with all addresses related to the opponent’s Pokemon, then when subscribing, we also provide the CurrentMap address as a relevant address. Then finally, we subscribe to the ItemAdded event in the returned ObservableStack. Now every time we face a new Pokemon, we will log a message similar to this:
Enemy found: RATTATA on map Route 1Converting bytes to letters
If you take a closer look at the EnemyNameChanged method, you will see that we have some conversions going on. Let’s begin with the ByteToCharConverter.
What we’re doing here is converting every single byte, and then returning a new string with the converted values. In order for me to explain this _firstIndex = 127, let’s check the encoding I mentioned earlier.
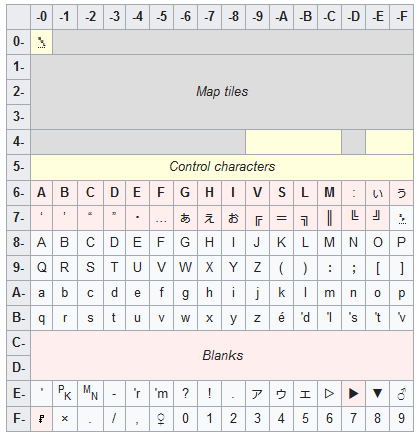
As you can see, it seems that we have two different possible values for the characters. The ones with the red background are Variable characters, and not relevant for us at the moment. So if we ignore it, we can see that the letter “A” is on line 8, column 0, which means that for the hexadecimal value 80, we should return an “A”. But since we get decimal values from our emulator, we cannot use 80, so let’s see how it looks in decimal with this online converter.
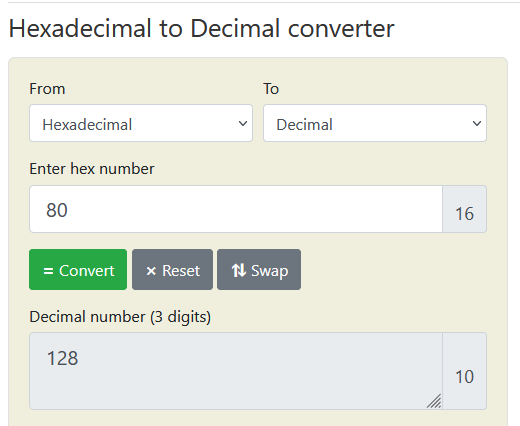
Makes sense right? Then now you might be wondering why are we starting with 127 and not 128. Well, that’s because we have a white space at the beginning, which is represented by 7F in the game. And guess what 7F becomes when converted to decimal?
We are also converting the CurrentMap value, but that’s much simpler (although lengthier) than converting the name. Through the ByteToLocationNameConverter, we simply map the value to the correct name.
Writing your own plugins
In case you want to play around with other ROMs, all you need to do is create a new project, have a class inheriting from ProjectDMGPlugin, and copy the DLLs to the PluginDlls folder. The latter can be done by setting a Post-build event with the following command:
copy /Y "$(TargetDir)$(ProjectName).dll" "$(SolutionDir)PluginsDlls\$(ProjectName).dll"After that, all you have to do is find out the address that you want to monitor and have fun!