
Application Performance Monitoring (APM) is the process of monitoring key software performance metrics in an application. The goal is to ensure that your app is running smoothly, reducing downtimes, and improving customer satisfaction. With the ELK stack, the Elastic APM agent can be easily created and added to your .NET solution.
Repo link
In case you want to go through the code by yourself, you can find it at this repository.
Prerequisites
A basic knowledge of Docker Compose is required for setting up the infrastructure for this article. Being able to run docker compose up/down is sufficient to get your solution going, but more knowledge is required if you are planning on improving the YML file.
Starting the ELK stack
First things first, we need to get our ELK deployment working, and luckily for us, Elasticsearch provides a docker-compose.yml for us that you can find here, or alternatively here in case the original article goes down.
So then, create a docker-compose.yml file and insert the contents of the YML file in the links. In case you followed the second link, don’t forget to also create the .env file.
Configuring the Elastic APM Integration
Now that we have our Elasticsearch instances up and running, we must configure the APM Integration. Access your Kibana deployment, then on the menu to your left, navigate to Observability > APM > Services, and press on “Add the APM integration”. Disable the Real User Monitoring, as we do not need it right now, and inside “Agent authorization”, provide a secret token for it. If you are wondering how to generate one, you can do it on this website.
Configuring the APM Agent in the Azure Functions
Now we are ready to send data to our APM server, so let’s configure our app. Let’s begin by creating a fresh ASP.NET Core API project with the following configuration:
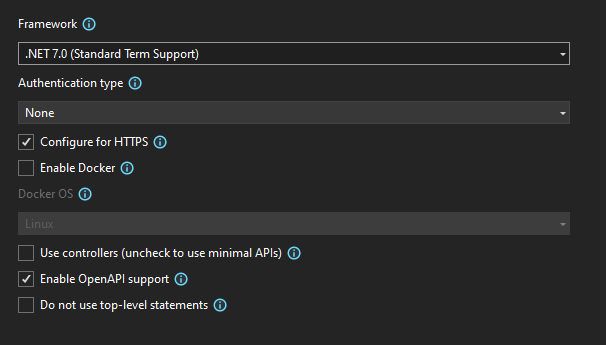
We are going without controllers since this is a very simple application, but there’s no problem if you’d like to use it. Once that’s done, let’s proceed by installing the Elastic.Apm.NetCoreAll package. It can be done through the following command:
Install-Package Elastic.Apm.NetCoreAll -Version 1.24.0
Now replace the contents of your Program.cs file with the following:
using Elastic.Apm.NetCoreAll;

var builder = WebApplication.CreateBuilder(args);

// Add services to the container.
// Learn more about configuring Swagger/OpenAPI at https://aka.ms/aspnetcore/swashbuckle
builder.Services.AddEndpointsApiExplorer();
builder.Services.AddSwaggerGen();

var app = builder.Build();

// Configure the HTTP request pipeline.
if (app.Environment.IsDevelopment())
{
    app.UseSwagger();
    app.UseSwaggerUI();
    app.UseAllElasticApm(app.Configuration);
}

app.MapGet("/GetBetResult", IResult () =>
{
    if (ShouldWin())
    {
        // We cannot let them win!!
        throw new Exception("Whoops! Something went wrong with the request. Please try again.");
    }

    return Results.Ok("Sorry! You didn't win, please bet again!");

    bool ShouldWin()
    {
        return new Random().Next(0, 10) > 5;
    }
})
.WithName("GetBetResult")
.WithOpenApi();

app.Run();
At line 1, we are adding the using directive for the installed package. Then at line 17, we instruct our application builder to use the Elastic APM middleware, providing it with our application’s configuration. We could leave it blank if we wanted to use environment variables. And lastly, on lines 20 to 35, we configure a GetBetResult route, which conveniently throws an error whenever the user would win, as we cannot afford losses.
We have one last file to go through, which is our appsettings.json:
{
"Logging": {
"LogLevel": {
"Default": "Information",
"Microsoft.AspNetCore": "Warning"
}
},
"AllowedHosts": "*",
"ElasticApm": {
"SecretToken": "8preTR2hVc1D03MfCL4535DswoAOPkFJ",
"ServerUrls": "http://localhost:8200",
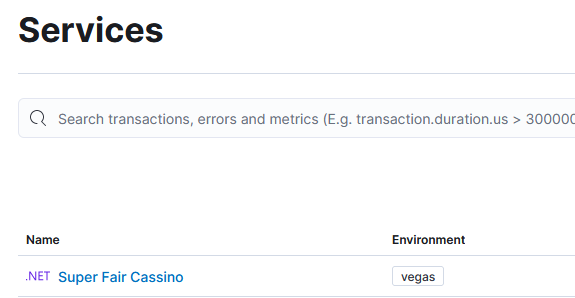
"ServiceName": "Super Fair Cassino",
"Environment": "vegas"
}
}
The “Logging” and “AllowedHosts” entries are generated by default, so let’s go through the “ElasticApm” one.
- SecretToken: The token we generated earlier when configuring the Elastic APM integration.
- ServerUrls: The URL for the Elastic APM Server
- ServiceName: The name of our service that is shown in the APM services list, as you can see in the image below
- Environment: The environment in which our app is running.
Running everything
Now that we have everything ready, begin by starting your containers with the command below. Note that you must be in the same folder as your docker-compose.yml file.
docker compose up -d
Verify that all of your services are healthy by running the command below and checking the Status column.
docker ps
Now execute your ASP.NET application with the command below. Again, note that you must be in the same folder as your .csproj file.
dotnet run
Now navigate to the Swagger link (port might vary) and execute it a couple of times to get some errors and some successes. Then browse your app’s APM page in Elastic at Observability > APM > Services and have fun exploring the data!
Troubleshooting “max virtual memory areas is too low”
You might get an error similar to this one:
max virtual memory areas vm.max_map_count [65530] is too low, increase to at least [262144]In case that happens, run the following commands (credits to this StackOverflow answer):
wsl -d docker-desktop
sysctl -w vm.max_map_count=262144