GitHub Actions is a CI/CD platform that launched in 2018. It revolves around workflows, which is an automated process that can run one or many jobs. These jobs can run commands, such as dotnet build, or even other actions. And let me tell you some great news: it’s super easy and can be totally free! Its usage is free for public repositories, and also for private ones, but then there are some limits.
Requisites
Before we dive into this, it’s worth mentioning that those workflows are written in YAML files. If you are not familiar with them, I suggest you take a look into some articles, such as this one. But YAML is very simples to understand, so don’t feel pressured about learning it.
Also, we will be picking up from a previous code of ours that contained a simple Azure Function. Basically, the function receives a POST request containing the weather and the duration, which is used to update a country’s weather. Not in reality, of course, we are still working on that. But the current solution has no unit tests, so we will be adding a new NUnit test project and create a simple test.
[Test]
public async Task BodyIsNull_ShouldReturnBadRequest()
{
    // Arrange
    var httpContext = new DefaultHttpContext();

    // Act
    var result = await Functions.Run(httpContext.Request, "Mars", null);

    // Assert
    Assert.That(result, Is.TypeOf<BadRequestObjectResult>());
}
Setting up the GitHub Action
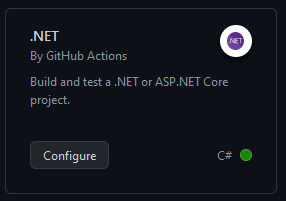
Now let’s create our very first GitHub Action. In your repository’s Actions tab, search for something like “test .net”, and click on “Configure” in the following workflow. Beware that you can easily mix “.NET” and “.NET Desktop” up.
Automatically, we will get the following YAML, let’s go through it and see what it means.
name: .NET

on:
  push:
    branches: [ "main" ]
  pull_request:
    branches: [ "main" ]

jobs:
  build:

    runs-on: ubuntu-latest

    steps:
    - uses: actions/checkout@v3
    - name: Setup .NET
      uses: actions/setup-dotnet@v3
      with:
        dotnet-version: 6.0.x
    - name: Restore dependencies
      run: dotnet restore
    - name: Build
      run: dotnet build --no-restore
    - name: Test
      run: dotnet test --no-build --verbosity normal
First, we have the “name” key. It defines the name of the workflow. It’s what will appear in the “Actions” tab. Since we have just a single one in our repository, it doesn’t really matter, but for bigger projects, you might consider giving a proper name.
Then we have the “on” key. It defines what triggers the workflow. There are many ways to customize this, and it’s not our objective to go through them all here. In the current scenario, we are triggering whenever there is a pull request event for the main branch, or when a push is made to the main branch.
The “job” key groups all the jobs related to this workflow, in this case, there’s only one called “build”. For this job, we have specified the “runs-on” key, which defines what type of machine the job should run on. Then we have the “steps” key, which defines all the steps of the build job. The “uses” keyword means that we will be running an existing action. In the first case, for example, we are using the checkout action, which you can find here, and more can be found here. The “run” keyword is more simple, it executes a command on the runner We can optionally add a “name” to our steps to improve the visualization when running the job.
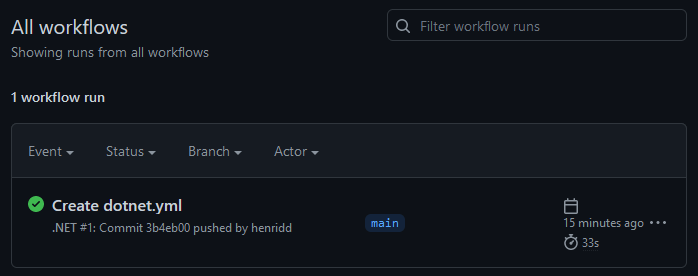
Our YAML file is completely ready by default, meaning that we don’t need any modifications. Hooray! So just click on the “Start commit” button and then “Commit new file”. Since we have set this job to run on pushes to the main branch, it should be executing anytime soon. If you navigate to the “Actions” tab again, you should be able to see your new workflow execution results. You can also click on the run to see detailed results about it, including details for each individual step.
And that’s it! This is just a preview of what we can do with GitHub actions. You can read more about it in the documentation, and feel free to take a look at this article’s code here.